Tuesday 29 March 2011

Week10. Reactor

This week We used reactor to create the animation of bowling ball knocking of the pins. The models were already created an imported to 3D Max. First I selected all objects and created rigid body collection by going to animation> reactor > create object> rigid body collection. Then in RB collection sub-window "properties" all objects were added using "ADD" button. Second step was to go to utilities> reactor> properties sub-menu and change mass of objects. The alley was set to 0, bowling ball to 20 and pins to 10 mass units. The reactor had strange impact on the pins, when the animation was simulated pins raised above the alley. This was corrected by changing pins "Col. tolerance" properties to 0.5 in Havok 1 World. The reactor prompted with error when col. tolerance was set to 0. Therefore, it was changed to 0.5. For even better results pins could be moved in the scene. With the autokey on, the bowling ball was rotated and repositioned in frame 5 in order to create the rolling ball effect. The reactor simulator can be turned on in preview and animation window by pressing "preview in window" and then pressing P in keybord. To see moving ball the start frame was changed between 1-5 in reactor timing, otherwise it would not show it in reactor simulation. When satisfactory result was achieved "create animation" button was used to transfer effect created in reactor to the actual timeline.

Bowling animation:
week9. Morpher

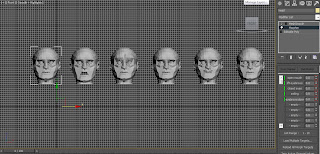
The head object was imported to 3D max. Then head was converted to editable poly. Then five copies of the head were created. Each head was suppose to present different facial emotion. While in editable poly roll out different polygons were selected and moved to imitate single emotion on different heads. The five emotions are open mouth, closed eyes, smiling, lift eyebrows and shrink eyebrows. when emotions were finished the main head object was applied with "Morph" modifier. Then in channel list roll-out box five "empty" boxes were assigned with modified head objects using "pick object from scene" button. Once all morphers were set up the animation took place. With the help of autokey i changed the values of each expression at wanted points in timeline. Finally i applied "meshsmooth modifier to the main head and rendered the scene.


And here is the animation:


Week8. Bones animation

This time we had to use bones to animated the torso. First the torso was made see-trough in its object properties window. Then the bones were created using the create->systems->bones panel.
The bones were placed along the arm bending points. The arm ended up with four bones including the small "guide" bone at the end. The bone system was moved to match the torso model. Another hand bone system was a copy of the previous one with some adjusted bones. The bones were rotated along the connection points. Then each bone was given a name. Each bone was edited in modifier panel by increasing size of side, back abd front fins so they would touch torso mesh on each side.

To make arm parts bend more natural "IK limb solver" was applied to the bones trough animation->IK solvers->IK limb solvers. Next the torso was "skinned". The torso object was applied with skin modifier. All bones were added to the "bones" box. Extra bone was created in the middle of the body to avoid unwanted stretching by the arms. It was modified and added to the torso bone system same as previous bones. To make bones movement even more natural the envelope of each bone was modified trough skin modifier envelopes sub-selection. The envelopes rings radius were changed to adjust how much mesh each bone affects. Finally, animation was creating by moving bones in different frames with autokey on.

King Kong and clapping animation:
Tuesday 8 March 2011

Week7. Introduction to Animation

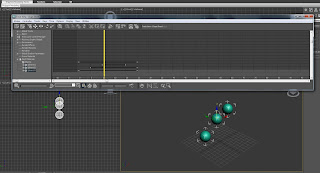
The first task was to animate the bouncing ball. The sphere was created using a sphere primitive object. The animation was created by pressing autokey button at the bottom of the timeline and adjusting sphere position at different frames. To make animation continious the cycle curve parameter was applied by selecting sphere and going to graph editors> Track view - Curve editor > select axis along which object is animated >parameter curve out-of-range types > cycle.


Then two more spheres were added to scene as instances. The animation length and start of each sphere was changed by going to Graph Editors> Track view - Dope Sheet.


Below is my first aniamtion test that I did with 3D MAX.


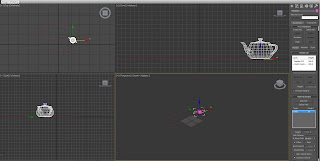
The second test uses object and the path. The object teapot was constrainted to the path trough Animation> Constraints> Path constrain. The "follow" checkbox was selected in path parameters rollout to make teapot follow the path instead of just moving along it

The camera was added to scene and camera's target was constrainted to the teapot in order to get camera follow the teapot. The extra path was created for the camera to get more movement. Finally extra objects were added to the scene and applied with materials.


Animated:

Friday 4 March 2011

Storyboard


I am a crappy drawer. Therefore, as you realized my storyboard includes the actual models that would be used in the trailer. I can not say that this is the final draft, this is more like first one and I will be considering some changes. The idea is to create a fast paced continuous action sequence. The trailer would use one of the James Bond movie soundtracks. I have to research the sounds that I am going to use in the trailer.


Storyboard:

1.Fade in to the gun. Camera pan around the gun and stops targeting left gun side.
2.slow-motion bullet shot will be shown here for second or two.
3.Pace is normal again and camera follows the bullet to the left. Bullet's speed is faster that camera. The bullet disappears to the horizon.
4.Static camera with "007" text written. Bullet flies to frame from right and leaves at right.
5.Close-up. Bullet morphs to the car. Camera pans down. The car fells on the ground and starts going left, camera follows. Various extreme close-up shot of car mirrors, tyres and body.
6.Ice palace appear in horizon. Camera zooms to the building and leaves car behind the frame.
7.Camera rotates around the palace.
8.Camera start to zoom out from the building. When camera has full shot of ice palace entrance car drives in and stops by entrance.
9.When all building is in the frame camera stop to zoom out. The light beam from the top covers the building. Light intensity increases very fast. Only light is seen in the frame.
10.Beam of light dissolves to black background. The movie release date moves from left, turns by an angle and moves out right.

Model3. Tyre

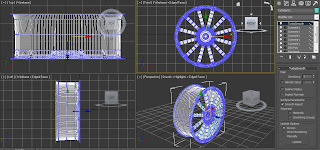
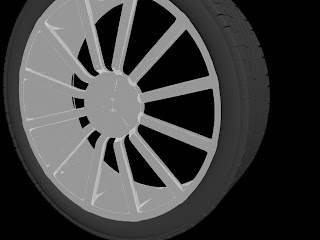
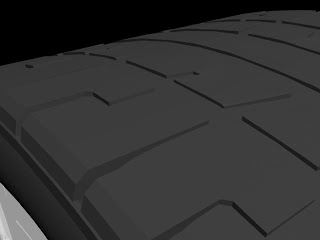
Actual plan is to model the car. Until now I only had enough time to make a wheel for my intented Astom Martin Vanquish model. The wheel is not totally finished. I will add more detail to the rim like logo, holes, bolts and side texture for the tyre. The reason for doing is that the trailer will use extreme close-up shots of car and wheels.


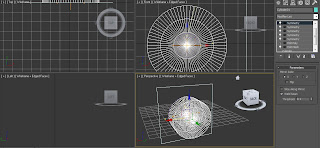
The car rim has a lot of symmetry in it. I had to model 1/24 of rim and use the symmetry modifier to build final shape of the rim. The cylinder was created and slice dialog box was turned on. Then the cylinder was sliced to small 15 degree part. The symmetry modifier was applied several times and every bit was rotated to finally compile rim. After the preparation stage edges, polygons and vertices of the cylinder were modified in editable poly sub-object menu. While modelling the object "show end result on/off" toogle button was used to see how changes in editable poly affect final object with symmetry and smoothing modifiers.


The tutorial that is referenced below in source list was folowed to create the tyre. First the tube was created and smoothen out with meshsmooth modifier. The tyre top texture started with standard box primitive. Box was aligned with the tube. Box was converted to editable poly and applied with my favourite symmetry modifier to create identical tyre sides. Later with tools>array help extra box instances were created by rotating them along the tyre center. To achieve this the box pivot point was moved to same point as the center of tube. The last step was to start modelling the box in editable poly section.


Finally all different objects were scaled, moved, grouped together and assigned with materials.


Sources:
Reference image http://www.exchange3d.com/3D%20Model%20of%20Aston%20Martin%20Vanquish%20Wheel/prod_12396.html#preview Reference image http://www.netcarshow.com/aston_martin/2001-v12_vanquish/800x600/wallpaper_07.htm
Reference image http://www.mattdrive.com/aston_martin_vanquish
Tutorial http://area.autodesk.com/tutorials/polygon_modeling_9_car_tyres

Thursday 3 March 2011

Model2. Ice Palace

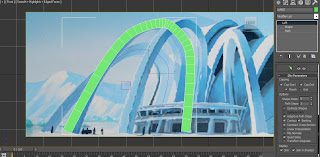
The ice palace is fictional building from the movie. Again it was hard to find proper reference images for my model and I have ended up with one image from the web and footage from the movie were palace is shoot at same side all the time. Once again I had to imagine some of the parts.

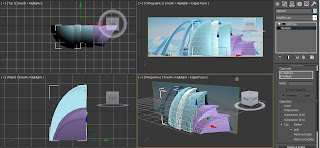
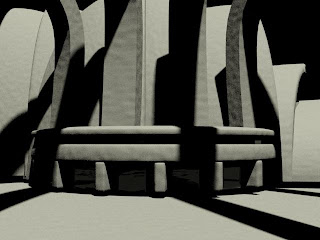
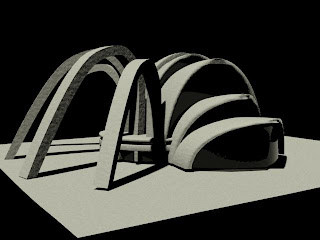
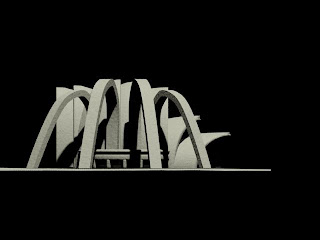
The oval parts are made using sphere with hemisphere and slice on. Decision was made to use the symmetry for other half of the building. The symmetry process was exactly as in the gun model. The first sphereon the left in the image below was copied. Boolean was used to remove inside polygons. The second and other spheres have windows. Again by using boolean and with cut > split option the outline was created at the intersection of the objects. The polygons were extruded to make a window. These polygons were detached as a new object for the purpose of applying different material to them and to remove unwanted smoothing.


The arcs were created by drawing similar shape with line tool. The rectangular shape have been drawn soon after. The line was applied with loft modifer as a path and rectangular was selected as the shape. Created object was converted to editable poly and bottom polygons at the end have been rotated to match palace base.


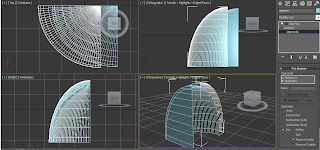
The entrace was created as a cylinder and sliced to half with slice on. Cylinder was converted to editable poly. The roof and first floor ground were created by extruding polygons. The polygons between windows were extruded and scaled horizontally. Edges were chamfered. Turbosmooth modifer was applied to the object. The polygons for windows were selected and assigned with polygon material id. The rest of the polygons were assigned with differetn material id. This was done in order to apply different materials to the object.

After modelling the snow material was applied to most of the parts. It was created using online tutorial which is refered in the source section. In the material editor diffuse color was set to white, self-illumination to 15 and specular level to 10. The "Mix" map was chosen from Maps>Bumps>none>Mix. In the mix parameters color#1 none button was pressed and applied with cellular map. In the cellular parameters under cellular characteristics "Chips" was chosen with 0.1 size. Back in the "Mix" parameters Mix amount was set to 50 and color#2 none was changed to "Noise" map. The size was changed to 1 in the noise parameters section. Entrance material was changed to "Multi/Sub-Object" . The windows id was assigned with glass material and the rest used snow material. The glass material was selected from "Arc&Design" material template list. To get this material the renderer had to be changed to mental ray renderer.
Finally building objects were grouped together. The daylight system was created and the shadows were turned on.


Sources:
Movie "Die Another Day" (2002) http://www.imdb.com/title/tt0246460/
Reference images http://www.sacredart-murals.co.uk/mural-gallery/james-bond-mural.html
Snow material tutorial http://www.3dsmaxresources.com/tutorial_display.php?id_tut=38&page=1

Model1. The Gun

The Walther P99 gun was the first model that I did. The hard bit for the modelling was finding reference images. Despite all the search that I did on the web I could not find blueprints or reasonable pictures with side, front and top views. Eventually I used one side view picture as my reference plane in 3D max and angle picture which gave me some guides for the front of a gun. For the proportions I had to use my common sense and try what looks best visually.
This first real modelling practise was very painful. I had to learn about 3d MAX saving file problem the hard way. Once I have finished to model all parts of the gun to the level that satisfied me and all it was to do apply materials the program crashed down. That was not a surprise, I thought I would just open the file and start from last time I saved. However, the program surprised me, when I got the message that file can not be opened. I realized that the file was corrupted when the program crashed and no back up files were created by 3D MAX. I researched it and found out that this is a common thing. When i started to model my gun from scratch again I made sure to save my progress twice. Once as a working file and every time as different copy in separate folder. Finally i ended up with about 15 save files of my gun.

Modelling

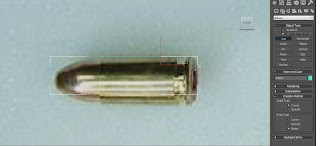
The first bit of the gun is bullet. The reference image was traced with line tool. This created the shape of the bullet. The lathe modified was applied to the shape. The segments were set to 30, direction axis chosen and weld core checkbox selected. In the lathe modifier axis sub-level was chosen and the position of rotation axis was adjusted for the best result. However, the weld core option did not work. Therefore, the object was transformed to editable poly. The middle vertices were selected and welded manually with weld tool int edit vertices rollout box.


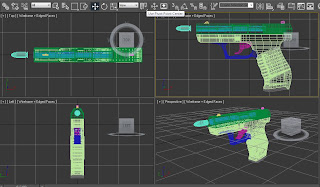
Other parts of the gun were created with box standard primitive. Therefore, only the steps taken to create main gun body are described. The box was converted to editable poly. The polygon sub-level was selected and polygon was extruded to match the reference image. This was done by moving, rotating and scaling polygons. It was decided to use symmetry modifier for other side of the gun as it is supposed to be identical . The back polygons were deleted to ease future welding of vertices at the symmetry objects intersection. Once the basic shape was achieved it was time to add extra edges for the sections were extra detail was wanted. It was easily done by selecting wanted edges manually and using loop or ring selection tools. Once all wanted edges were selected connect tool was used from edit edges roll out. Wanted amount of segments were chosen and pinched or slided as required. While creating detail for objects the turbosmooth modifier was used to see future smoothing effect. When all the edges were created the vertices were moved to match the shape of the detail. After that polygons were extruded for the detail. The turbosmooth was smoothing all sharp edges. The edges that was supposed to be sharp were selected and chamfered to reduce smoothing effect. To make some of the edges even more sharper extra edges was added around them. The gun has a bit at the bottom right which is for a better grip, similar one is also at the part were thumb is supposed to be when shooting. Those parts were created by moving vertices deeper to the object and the smoothing did the rest.


The little bumps on the handle were created as a standard primitive sphere with hemisphere selection to 0.5. The snaps toggle option was selected and set to edges/segments in order to attach sphere exactly to the gun. Once placed it was copied multiple times and moved around the handle to imitate the bumps. The spheres were grouped all together. Finally the symmetry tool was applied separate to the main gun part and group of spheres, because spheres did not require smoothing. Therefore to avoid extra amount of polygons turbosmooth have been applied only to gun. In the symmetry panel mirror axis was chosen and weld stream check box selected with 0.1 treshold value.


The gun barrel was created using the boolean. The standard primitive cylinder was created and aligned with the bullet as in the picture. The boolean from compound objects was used to create exact size barrel by subtraction. The new shape was scaled along to make a longer gun barrel.


Boolean was also used to make a perfect hole in the top part of the gun for barrel Top part was applied with boolean. The barrel was placed inside it. In the boolean parameters the cut was chosen. This created the new polygons at the intersection parts. Then top gun was converted to editable poly and polygons were the gun barrel was placed have been removed.


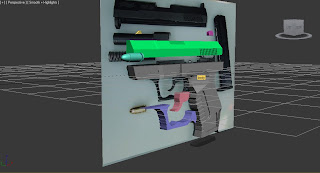
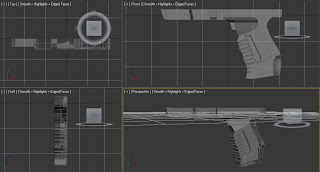
Here is separate gun parts all aligned together.


Before smoothing

Finally all parts were grouped together. Gun and bullet were applied different materials. The daylight system was created to make better lightning effect.


Sources:
reference gun image http://en.wikipedia.org/wiki/File:Walther_P99-JH02.jpg
gun side view http://www.mi6.co.uk/sections/dad/p99.php3?t=dad&s=dad


Moodboards

Here are the moadboards with my initial ideas for models. Every board consist of three objects that were in "Die Another Day" movie. Some of the chosen objects are iconic to the whole James Bond series and some of them identifies the chosen film . The main idea was to chose things from the movie that in a way are similar and would be able to create a short theme for the trailer rather than being individual . Most of the images were taken from the movie and some from the web.


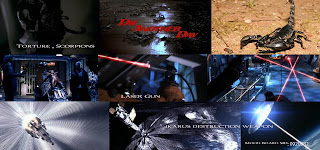
The first moodboard can be called "Obstacles". These are meant to represent the obstacles that James Bond character has to overcome to survive and finish his mission. The first objects is from the titles sequence. The title scene consist of James Bond being tortured while held in captivity at North Korea. The scorpions were one of the torture methods implemented by Koreans. The second objects is the laser gun from the second half of the movie. The segments shows Bond trying to safe the American agent Jinx from laser beams while fighting against the villain. The last item is "Ikarus". It is the massive laser in the space. The main villain unveils his intentions to use this weapon against other nations to prove the glory of North Korea.


The second moodboard consist of car and the gun. These are iconic gadgets that James Bond always use to fight his enemies. The gun used in the film is Walther P99. Bond drives the Aston Martin vaquish car which is loaded with guns, gadgets and camoflash feature. All of the story twists and main action is based at the ice palace. It is truly an impressive building and would be great to model.


The third moodbard is about features of James Bond series. It consist of action, luxury and romance that every Bond movie has. Action is represented with hovercraft chase. Diamonds are mentioned in many scenes and stands for the luxury part. No James Bond movie can avoid the romance. There are two girls in the move that were seduced by James Bond charms. The Jinx who is American agent and the another British MI6 agent which unfolds to be a traitor.


Sources:
movie "Die Another Day" (2002)
Gun http://www.mi6.co.uk/sections/dad/p99.php3?t=dad&s=dad
Scorpion http://www.richard-seaman.com/Wallpaper/Nature/Arachnids/index.html
Gun http://www.yourprops.com/James-Bond-s--Pierce-Brosnan--Hero-Live-Fire-Walther-P99-original---screen-used-movie-props-James-Bond--Die-Another-Day--2002--prop-28238.html

Wednesday 2 March 2011

Week5. Cameras

The camera can be added to the scene from the create > cameras panel. There is a target and free camera. The target camera which I tried was targeted at the tea pot. When a camera is inserted to the scene and one of the views is changed to be camera view the bottom right corner view tools are changed to camera functions which let to change the lens length, camera and target position and view. In the example below target is tea pot. The perspective function was used to emphasize the distance and size between objects.


In example below the depth of field option was chosen from the camera modify panel multi-pass effect roll out box. This focused camera to a teapot making objects further away and background appear out of focus and blurry while the teapot is all sharp and clear.


Week4. Ligthing

First it was a good practice to create a single plane for shadows and light reflections. The plane was applied with noise modifier to get a bumped surface.

Later the scene was inserted with omni and target spot lights. The omni light was placed inside the pumpkin. The shadows were turned. Then the color of light was changed to blue and multiplier was adjusted to change the light intensity. The spot light was placed above the pumpkin. The hotspot and falloff setting were changed to narrow a beam of light to the size of pumpkin. Again the shadow option was turn on and color was changed. The smoke effect was achieved by adding volume light in atmospheres and effects box. The noise on check box was selected in volume light setup window. The noise amount parameters was changed to 0.7. Below is the final scene with finished lighting setup.


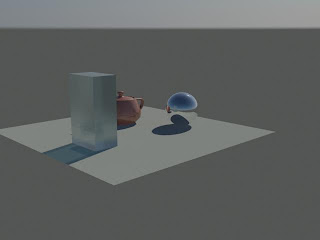
The image below use the daylight system lighting. First the objects were created and applied with arc & design materials. To get these materials the render was changed to Mental Ray Rendered by going to the rendering > render setup > common > assign renderer > production > mental ray renderer. The material templates frosty glass, chrome and clay were chosen and applied to the objects. The daylight system was quickly created by going to create > systems > Daylight System. The compass was placed along the objects and the daylightassemblyhead was moved further away. At the daylight parameters mr Sun was chosen from sunlight box and mr Sky from the skylight box. The final step was to turn on the shadows and reder the scene.